I’ve been trying to figure out this recipe for a year and a half and have finally come up with a recipe that works (this is not the traditional Brazilian Cheese Bread recipe, that boils the milk and oil first).
One of the crucial things that I found out, is that there are 2 kinds of tapioca flour, fermented tapioca flour that rises (not sold at this point in the United States) and regular tapioca flour that does not rise (the tapioca flour that is sold in the United States). So having figured that one out, the trick is to use gluten free baking powder to get this delicious cheese bread-balls-tiny loafs to rise.
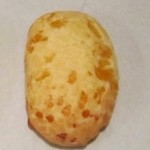
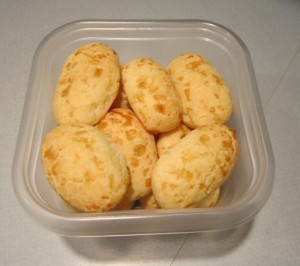
Traditionally Brazilian Cheese Bread/Balls are round, for some reason I like mine looking like little loafs, so that’s what I’ve pictured here.
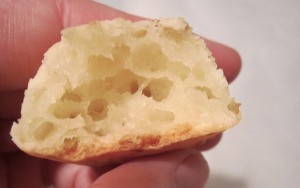
Brazilian Cheese Balls/Bread are traditionally chewy on the inside, this version is much more like regular bread – a eureka moment.
And this version is lactose free. The cheese, mozzarella and parmesan are lactose free and I use lactose free milk. You can use regular milk.
Tapioca flour has the consistency of cornstarch, and after a certain point, it’s impossible to mix by hand. So what I’ve done is added enough tapioca flour to be able to mix, and then knead the dough with extra tapioca flour.
Recipe below:
2 cups shredded mozzarella cheese
1/3 cup parmesan cheese
2 eggs
1 Cup milk (I use 1%)
1 1/2 t salt
2 t gluten-free baking powder
2/3 cup canola oil
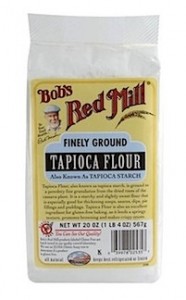
3 cups tapioca flour (I use Bob’s Red Mill)
Extra tapioca flour for kneading the dough
Preheat oven to 350 degrees.
Mix cheese, salt, baking powder, then add eggs using a fork until the eggs are mixed into the chess, salt and baking powder mixture. Stir in milk and then add the oil, and you can still use a fork. Add tapioca flour, mix with a spatula.
Put in the refrigerator for 15 to 30 minutes, to let the dough bubble (it bubbles!!) and to set. The longer it sits, the firmer it will be. There will be a little oil on the top, don’t worry, it will be kneaded into the dough.
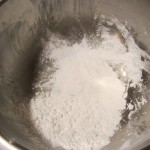
In a large bowl (you could do it on the counter, but the flour is so fine it gets everywhere, hence the recommendation for a bowl) put about 1/4 of a cup or so of tapioca flour (see photo).
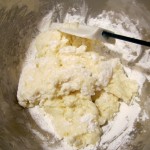
Take a third of the mixture, with part of any of the oil that is on top, and put the dough in the bowl with a spatula and coat it with the tapioca flour (see photo).
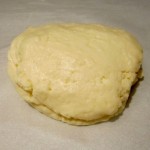
Take square of parchment paper and put the dough on the parchment paper and knead it. (Again, you could knead the dough on your kitchen counter, but this just makes it a whole lot easier to clean up.) Add more flour if needed (no pun intended), and knead it into the dough, until it is firm (see photo). It will be greasy, don’t worry, it’s one of the things that makes it taste good.
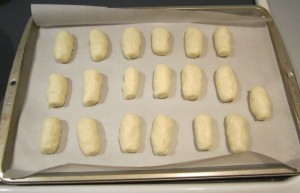
Take enough flour to make about an inch and a half ball of dough. Roll the dough in your hands and then roll into a tube shape about 2 inches (see photo). A third of the dough makes about 15 little “loaves.”
Cover a cookie sheet (roughly 15″ x 10″) with parchment paper. Put the little loaves on the parchment paper (see photo) and put the cookie sheet into the 350 degree oven. Then take a look in about 15 minutes (it should take a total of 20 to 25 minutes, oven temperatures vary).
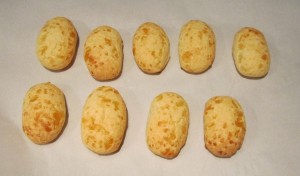
At 15 minutes the little loaves should be rising. Watch carefully for the next 10 minutes. Often the loaves at the end of the cookie sheet will brown before the inside loaves. Take out the loaves as they become golden and place on a piece of parchment paper to cool. You want the loaves golden (see photo) but not too brown.
Let loaves completely cool and then place in a container (see photo). Place open container in refrigerator to cool some more. When the loaves are cold, put the lid on the container and freeze.
To eat (if you haven’t eaten them all right then and there) you can defrost them in a microwave.
The loaves have bubbles, holes, just like real bread, and people that I have served them to just can’t stop eating them!! So they are great for folks who aren’t gluten free at all.
Makes 45 – 50 small “loaves.”
Another breakthrough gluten free eureka moment for moi, and hopefully for you too.
(To see why in the world The Newburyport Blog has a recipe for Gluten Free Brazilian Cheese Bread-Balls-Tiny Loaves, please press here.)
